
Menu Builder
Overview: This section allows you to create and modify the navigation menus for your website. You can add pre-built pages or custom pages to your navigation.
Access: To access the “Menu Builder” settings, navigate to “Pages” -> “Menu Builder” in your dashboard.
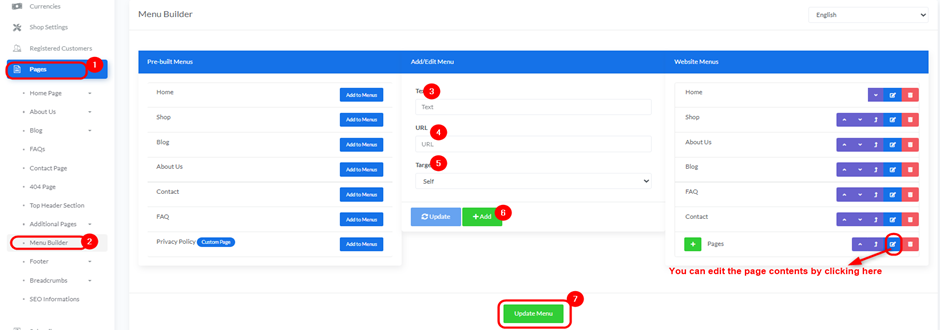
Managing Menus: The “Menu Builder” page displays three main panels:
- Pre-built Menus:
- This panel lists default available pages like “Home”, “Shop”, “Blog”, “About Us”, “Contact”, “FAQ”, and “Privacy Policy”.
- To add any of these to your website menu, click the “Add to Menus” button next to each page name.
- Add/Edit Menu:
- Text: Enter the text to be displayed in the menu.
- URL: Enter the URL that this menu item will link to.
- Target: Use the drop down to specify how the link should open (e.g., “Self” for opening in the same window).
- Update Button: Click to update an existing menu item.
- Add Button: Click to add a new menu item.
- Website Menus:
- This panel shows the current structure of your website’s navigation menu.
- Drag and Drop: You can reorder menu items by dragging and dropping them to change their display order.
- Edit: Click the edit icon (pencil) to modify the details of a menu item.
- Delete: Click the delete icon (trash can) to remove a menu item.
- Pages: Use the drop down to add additional created pages to the menu.
Update Menu:
- After making all necessary changes to the menus, click the green “Update Menu” button at the bottom of the page to save the changes